Points Cloud *
Full Metrolog optimization to be able to process millions of points.
New database points cloud tab page.
Possibility to acquire clouds in manual (using arms or laser) or automatic modes (using arms, T-Scan, CMMs).
Three new alignment creation instructions point cloud oriented:
Quick-fit
Best-fit
Fit on retrieved features
Improvement of feature retrieve functionality (circle, plane, flush and gap...).
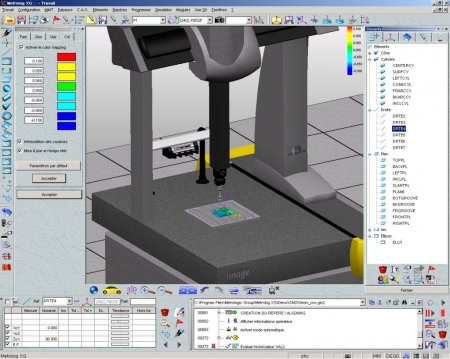
New "Surface Mapping feature for points cloud analysis on the complete CAD or on a part of the CAD. Ability to generate automatically a color mapping associated to this feature.
New Flush & Gap feature.
Points cloud meshing with optional smoothing included.
Advanced points cloud filtering functionalities.
AC, PSL, STL, MTL import / export file formats.
Specific toolbar for point cloud 3D view visualization.
Features
Better consistency between Surface Point and Geometrical Point : same display, same result window, same automatic measurement methods, same print report, same way to define coordinates.
All feature construction fields can be set with calculated values.
Ability to define circle on a cone surface with automatic diameter adjustment.
Possibility to use CAD curves or sophisticated CAD projections to define surface points or geometrical points.
New construction of a geometrical point : offset a point along a direction and a distance.
Best-fit feature construction based on other features probing points.
Construction of line based on other feature direction (main axis or normal).
Automatic inner / outer property recognition in the feature definition dialogs, according to the click or the CAD.
It is now possible to evaluate a circularity on a cone (ISO 1101:2004).
Feature naming rule improvement.
Warning during definition if the shape does not fit the feature. (if a user try to define a circle on elliptic shape).
Single and total runout improvement
Trackers and Arms functionalities
Possibility to use a Metrologic Bundle available to all types of trackers and arms. *
Sphere and circle features can now be used as orientation points.
Improvements in the Build & Inspect: *
a control points prefix name and a family name can be set,
possibility to compare axial feature to cylinder parallel or not to the current alignment axes,
possibility to compare cylinders and cones features to reference shapes.
Ability to combine automatic mode and manual probing.
Support point temperature compensation for Leica, API, Faro tracker. *
Import / Export
Support of the GSURF statement in the DMO import. *
Possibility to import basic point files in working sessions (position, position with normal, point name and position, etc.).
Features (including 3D features shape) can be exported as IGES file.
GM2 program engine
Improvements in path display (ability to display path on part program selection or on all program, and possibility to display only probing points).
Direct jump from active feature to its definition instruction in a part program.
New Find and Replace dialog.
New program import format: DAT.
Improvements in the PNT program converter:
define and/or measurement instructions,
automatic normal calculation by projection on CAD,
selection of the features of the file.
Improvement of the POLAR coordinates management :
teach probing points in the coordinates system of the definition feature,
teach constructions in the coordinates system based on the coordinates system of the features,
support polar coordinates in the Convert Hit Points dialog.
New security position management instructions.
In off-line, possibility to force a part program to be run in automatic mode.
Manual probing assistant can now be based on probing points during a part program execution.
DMIS program engine *
New dialog to generate easily OUTPUT instructions.
Approach and Retract distances automatically adapted to feature size. And these instructions are now learned in the part program.
Automatic recovery of head position and execution mode in a DMIS part program.
Improvements in the PNT program converter:
define and/or measurement instructions,
automatic normal calculation by projection on CAD,
selection of the features of the file.
Improvement of the POLAR coordinates management :
teach probing points in the coordinates system of the definition feature,
teach constructions in the coordinates system based on the coordinates system of the features,
support polar coordinates in the Convert Hit Points dialog.
Possibility to run an external program via the ScriptEngine.
Ability to set a prefix feature name in the Convert Hit Points to Geometrical Points dialog.
Ability to update feature/alignment databases when editing DMIS alignment statements.
CAD
CAD entities orientation visualization in the 3D view.
Possibility to reverse the entity orientation.
When defining a geometrical feature from a CAD entity, automatic inner / outer property initialization based on the surface orientation.
Possibility to create a CAD surface by extension with one click on a circle.
Catia V5 R17 supported. *
Automatic CAD surfaces re-orientation with one click.
3D View
Ability to show / hide alignment representation in 3D view for current or CAD alignments.
It is now possible to modify the alignments axes sizes.
New statistic histogram column that can be added in stickers.
New detailed 3D view for form tolerances (flatness, straightness, circularity and cylindricity).
The feature names are now displayed in transparency in the 3D view.
Stickers: feature icon depends of the font size.
Probes *
Faster continuous probes qualification process based on simple points calibration.
Optimized SP600 and SP25 probes calibration.
Support of "L" continuous probes calibration (manual and automatic).
CMM interfaces *
Faro Track Arm.
Perceptron optical sensor on ME5007, ME5008 and CimCore Infinite arms.
Kreon optical sensor available on ME5007 and ME5008.
Leica T-Scan.
Faro Scan Arm.
Reminder: Possible setup with opticals sensors:
Sensors
T-Scan Perceptron Kreon Datapixel Metris ScanArm
Interfaces Leica
LTD Series X
CimCore
Infinite X X
Faro
Titanium/Platinium X X
ME5007
ME5008 X X Next Patch Next Patch
Miscellaneous
It is now possible to define the translation values of a geometrical alignment directly by clicking in the 3D view.
Possible to auto-detect CMM parameters in the Setup Assistant.
New possibility to choose between nominal and actual values in calculated values.
New setting to define the delay between continuous mode and standard mode (portable CMM).
When using the Operator mode, the starting program folder is always reinitialized to its right value after a program execution.
Advanced settings panel can be resized.
Tags: feature, program, points, coordinates, automatic, features, define, probing, Possibility, point, based, instructions, Points, Ability, system, cloud, possibility, dialog, alignment, definition
